How the Paver Installation Process Works Step-by-Step
People searching for how the paver installation process works step-by-step are typically looking to understand the project and find local contractors who can expertly handle each stage.
Understanding how the paver installation process works step-by-step can help property owners feel more confident when planning a new outdoor surface. Whether preparing for a driveway, patio, or walkway, knowing what to expect ensures the project runs smoothly and aligns with personal goals. Local contractors specializing in paver installation are equipped to guide homeowners through each phase, from site preparation to the final finishing touches, making the entire experience more manageable and predictable.
Property owners in the area often explore this topic to better understand the scope of the work involved and to make informed decisions about their outdoor upgrades. Learning about the typical steps involved can also help identify the right service providers for the job, ensuring quality results tailored to individual property needs. By gaining insight into the process, homeowners can more confidently connect with local experts who can handle the installation efficiently and professionally.
- Paver Driveways - homeowners seeking durable and attractive driveway surfaces often rely on local contractors to handle the step-by-step installation process.
- Patio Installations - individuals wanting to enhance outdoor living spaces can find service providers experienced in managing the entire paver patio setup.
- Walkways and Pathways - those looking to create functional and aesthetic walkways turn to local pros for a comprehensive installation approach.
- Pool Decks - property owners aiming to improve poolside areas benefit from local service providers skilled in installing paver pool decks step-by-step.
- Landscape Hardscaping - clients planning to add defined outdoor features often work with local contractors who guide them through the paver installation process.

When homeowners search for how the paver installation process works step-by-step, they often want a clear understanding of what to expect when planning a new outdoor surface or upgrade. This topic relates to projects such as creating a new driveway, patio, walkway, or pool deck. Many property owners are looking to enhance their outdoor spaces for both aesthetic appeal and functionality, which can involve replacing old, cracked surfaces or installing entirely new patterns and layouts. The process typically involves multiple phases, from initial site preparation to the final finishing touches, and understanding these steps helps homeowners coordinate with local service providers effectively.
The paver installation process is connected to a variety of property types, including residential yards, commercial courtyards, and public parks. These properties often require durable, visually appealing surfaces that can withstand foot traffic, vehicle weight, or weather conditions. For homeowners, the project may be driven by the desire to increase curb appeal or improve outdoor usability, while commercial property owners might focus on creating inviting walkways or parking areas. Local contractors specializing in paver installation are experienced in handling different property sizes and types, tailoring their approach to meet specific needs and site conditions.
The process generally begins with a thorough assessment of the site, where local pros evaluate the existing surface, soil conditions, and drainage requirements. This step ensures that the foundation will support the new pavers and prevent future issues like shifting or cracking. Next, the area is excavated and prepared, which involves removing old materials, grading the ground, and installing a base layer of gravel or sand. Proper base preparation is critical for a long-lasting installation and is a key service that local contractors provide to ensure the project’s success. Once the base is ready, the pavers are laid out according to the chosen pattern, with careful attention to alignment and spacing.
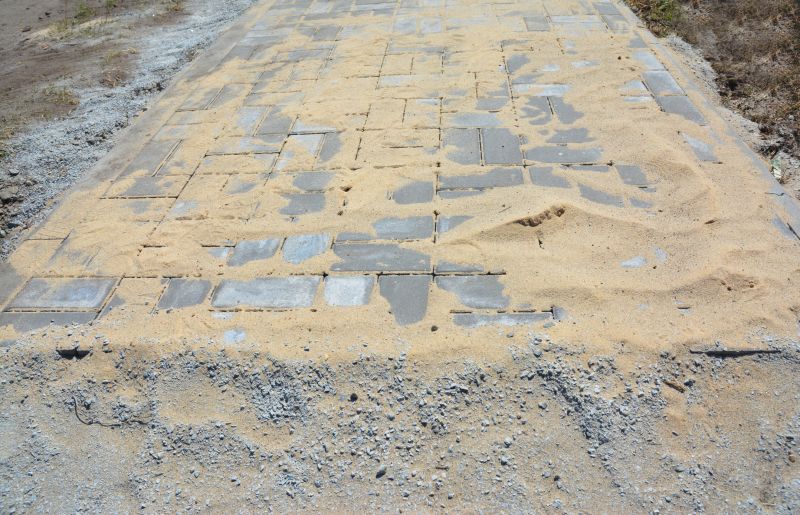
Finally, the installation is completed with jointing sand filling and compaction, which stabilizes the pavers and prevents movement over time. Some projects may also include sealing or finishing touches to enhance durability and appearance. Throughout each stage, local service providers work closely with homeowners to ensure the project aligns with their vision, budget, and site conditions. Understanding how the paver installation process works step-by-step helps property owners make informed decisions and collaborate effectively with local pros, ensuring the final outcome is both functional and visually appealing.
Concrete paving projects - these projects require similar planning, site preparation, and precise installation techniques as paver installation services.
Patio construction - involves surface leveling, base material preparation, and detailed layout work akin to paver installation processes.
Driveway paving - demands careful surface grading, excavation, and material placement, paralleling steps in paver installation.
Walkway installation - includes site assessment, base preparation, and precise placement, similar to the paver installation process.
Retaining wall construction - requires planning, excavation, and foundation work that overlap with paver installation planning and preparation.
Landscape design projects - often incorporate paved surfaces, requiring coordination of planning, layout, and surface finishing services from local contractors.
When comparing service providers for paver installation, it’s important to consider their experience with similar projects. Homeowners should look for local contractors who have a proven track record of completing paver installations comparable in size and complexity to the job at hand. An experienced professional is more likely to understand the nuances of the process, from preparing the site to laying the pavers and finishing the surface, ensuring a smoother project flow and a more reliable outcome. Checking references or reviews can provide insight into how well a contractor has managed past projects, highlighting their ability to deliver quality work consistently.
Clear written expectations are essential when evaluating potential service providers. A reputable local contractor should be able to provide detailed descriptions of the steps involved in the paver installation process, including materials used, project scope, and timeline estimates. Having this information in writing helps ensure that both parties are aligned on what the project entails, reducing misunderstandings or surprises along the way. Homeowners should also ask for any warranties or guarantees offered, so expectations about the durability and finish of the work are transparent from the start.
Good communication is a key factor when choosing a local contractor for paver installation services. Service providers who keep homeowners informed about the progress, answer questions promptly, and clarify any uncertainties demonstrate professionalism and reliability. Clear communication fosters trust and helps ensure that the project proceeds smoothly, with everyone on the same page regarding the steps involved in the paver installation process. By prioritizing contractors known for their responsiveness and transparency, homeowners can feel more confident in selecting a partner capable of managing the project from initial planning through completion.
Property owners often search for how the paver installation process works step-by-step when they are planning practical projects around their homes and businesses. Local pros provide Paver Installation Process services for everyday jobs and straightforward project options.
Understanding how the paver installation process works step-by-step can help property owners plan for projects such as creating a new driveway, patio, or walkway. Typically, local contractors start by preparing the area, which involves removing existing surfaces and ensuring the ground is level and stable. This foundational work is essential for a durable and attractive finished product. Once the site is prepared, the service providers lay down a base material, such as gravel or sand, to provide proper support for the pavers. Afterward, they carefully place the pavers in the desired pattern, making sure they fit tightly together. Finally, the installation is finished with jointing sand or another material to lock the pavers in place, resulting in a smooth, functional surface.
Many property owners search for information on how the paver installation process works step-by-step to better understand what to expect during a project. They might be planning a new outdoor space or replacing an older surface that has become uneven or cracked. Local contractors who specialize in paver installation can guide homeowners through each phase, from site preparation to the final adjustments. These service providers bring the experience needed to handle the work efficiently, helping ensure the project meets both aesthetic and practical needs. Consulting with local pros can make the process straightforward and help property owners feel confident about their outdoor upgrades.
What are the initial steps in the paver installation process? Local contractors typically start by assessing the site, measuring the area, and preparing the ground to ensure a stable foundation for the pavers.
How do local service providers prepare the base for paver installation? They usually excavate the area, install a compacted gravel or sand base, and ensure proper leveling to support the pavers and prevent shifting.
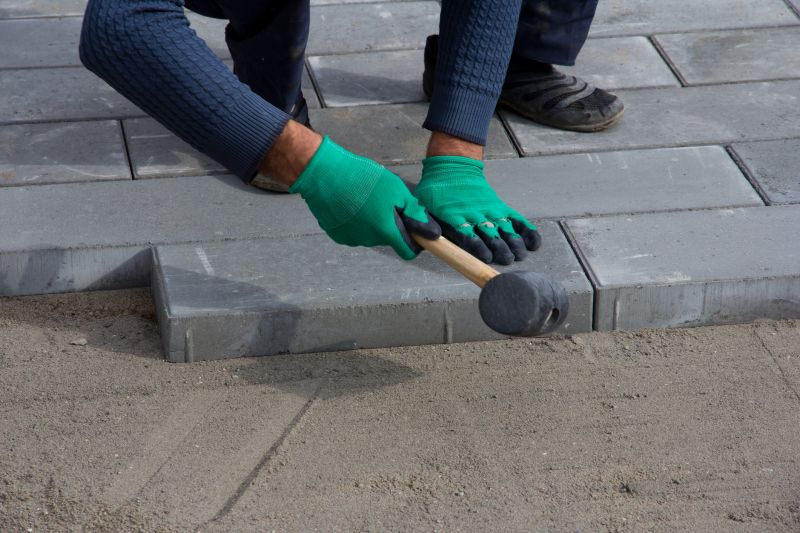
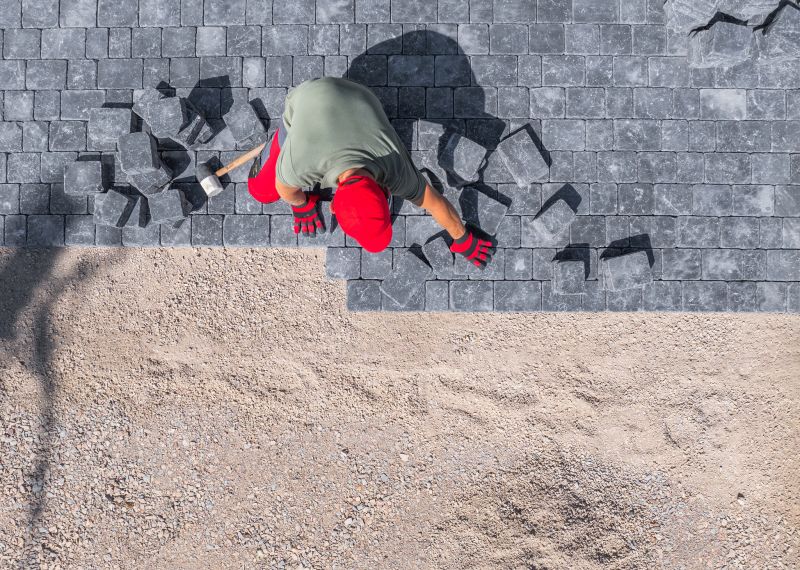
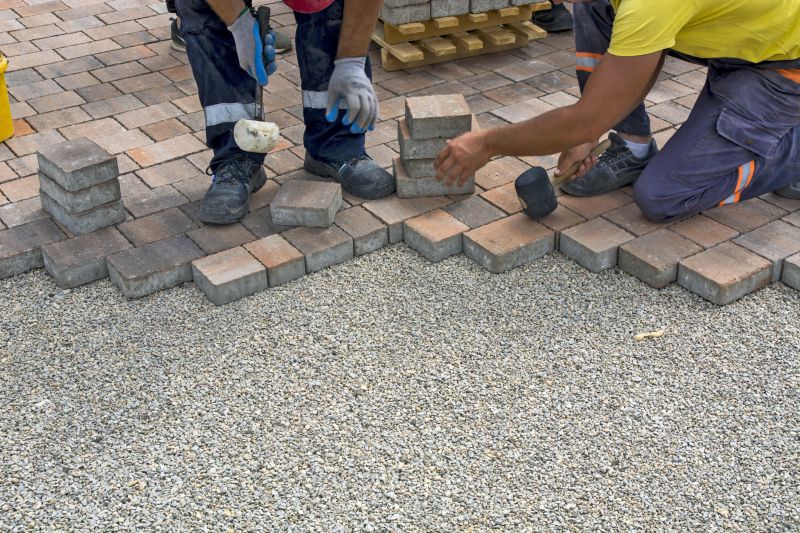
What is involved in laying the pavers during the installation process? Pavers are carefully placed in the desired pattern, with contractors adjusting for evenness and spacing to achieve a uniform surface.
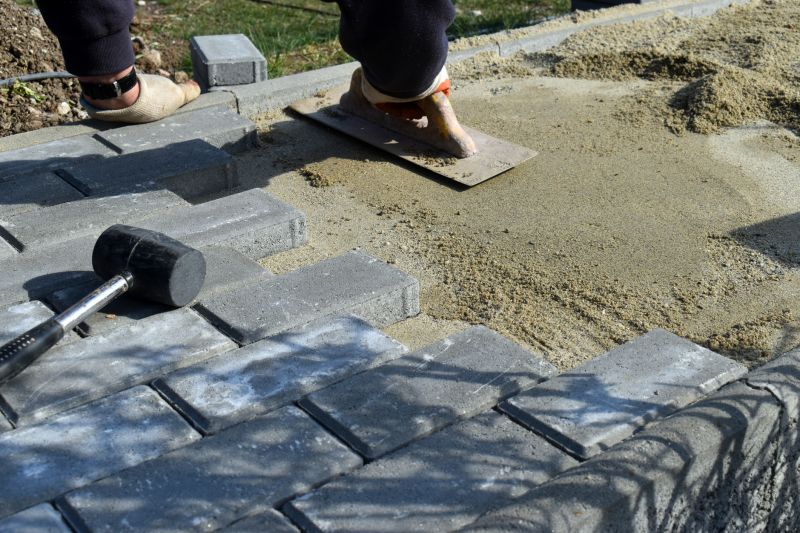
How do pros handle the finishing touches after laying the pavers? They typically add joint sand, sweep it into the gaps, and compact the surface to secure the pavers and ensure stability.
What steps are taken to complete and clean up after paver installation? Local service providers remove excess materials, perform final leveling, and clean the area to leave a finished, professional-looking surface.
Preparation and Planning - Property owners can work with local contractors to determine the best paver materials and layout for their space, ensuring the design meets their practical needs.
Site Excavation - Local service providers can handle excavation to create a stable foundation, which is essential for a durable and level paved surface.
Base Layer Installation - Professionals can install a proper base layer to support the pavers, helping to prevent shifting or settling over time.
Paver Placement and Finishing - Experienced contractors can carefully place and secure pavers, then add joint sand and finish the surface for a smooth, long-lasting result.
If you are thinking about how the paver installation process works step-by-step for a property, this guide is meant to help you understand this topic, the typical project types, and how different options might fit your plans.
When you are ready, you can use the quote form on this page to share a few details about your project. From there, local pros can review the basics and follow up with options that match what you have in mind.